Introduction: Building the Italeri 1/35 scale M-47 Patton
-(Pics Below)-
For the modeler who has some years in the hobby it is well known that there are certain types of models which most manufacturers have almost completely ignored. This is the case with the M-47 Patton in 1:35 scale. Academy and Monogram have both kitted an M-47 and in the case of Monogram their offering was in 1:32 scale. As it is, Monogram’s kit was offered in an unusual scale for military models. Enter Italeri to the rescue.
The Model:
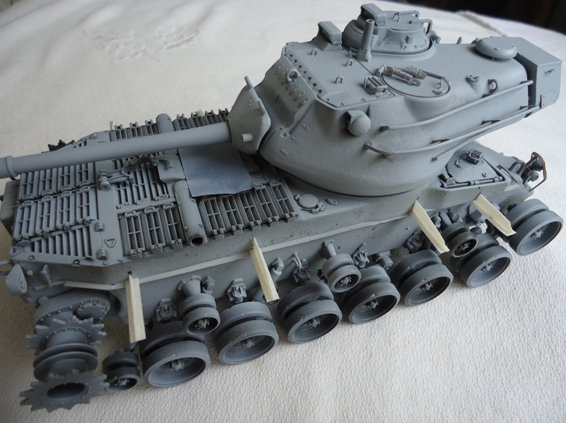
The 1:35 scale M-47 Patton by Italeri is a very good option for this famous AFV. It is a basic kit and it possesses enough detail to allow the super detailer a framework for detailing their model to the level he/she desires. This kit has a basic engine and transmission that screams “super detail me” and in this article that is exactly what I am going to show you.
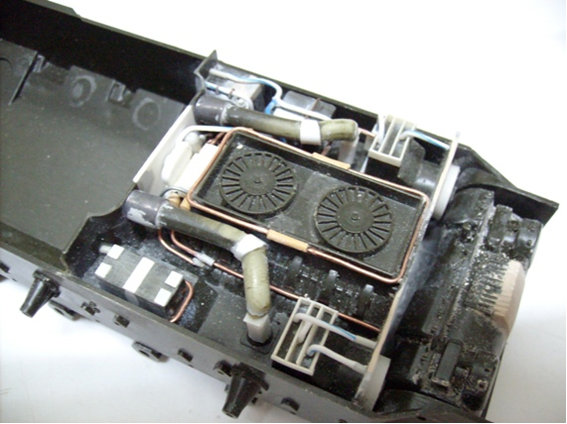
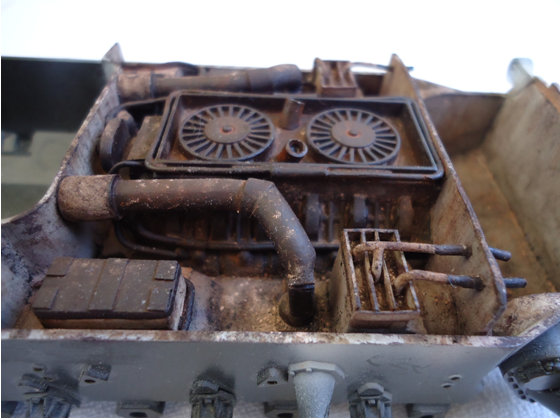
The Engine:
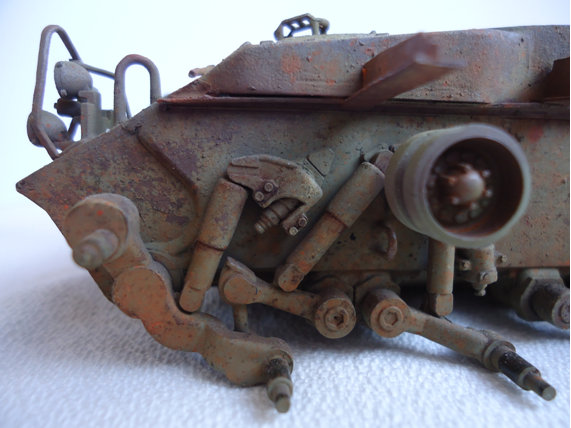
The engine and transmission each have simple details. To super detail these areas one starts by cutting out the stock molded detail. Once this is accomplished, the lost plastic that divides these components is puttied over and copper wire and plastic sheet is added. The copper wires used for detailing this area must be different sizes and gauges. The final details are various cables made from different sizes of stretched sprue. The last component will be detailed with plastic card stock.
It is always good to have a good reference to rely on and in this case, “Patton Tank American History,” Remember to have a variety of wires with different gauges plus plastic stock and soft lead wire.
Painting the Engine:
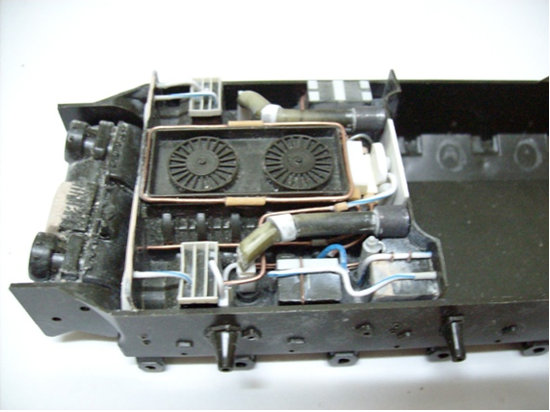
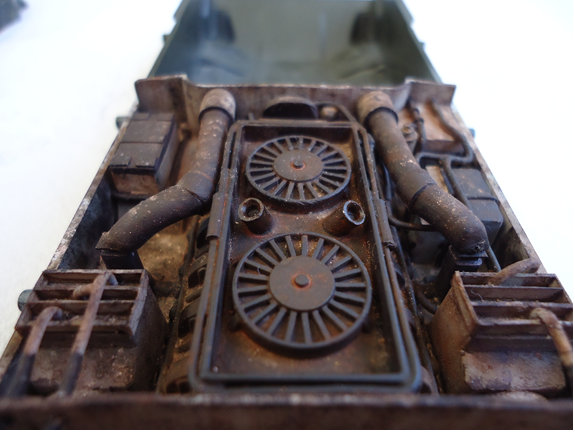
The idea is to expose the mechanical components of this vehicle and highlight the visibility so our extra detail stands out. My goal in this article is to replicate a tank in a state of neglect and disrepair located in the United States sometime during 2005.
Upon completion of the engine compartment base coat it Gray (H-127 Humbrol) although when factory new, this area was white. It should be noted that these vehicles are never clean due to the oil, grease, and dirt that can enter by wind and other outside factors. This should be taken into consideration.
Once a base coat is applied, mix gray/ black (Humbrol H-33) (75%) plus (Humbrol H-113) red oxide (25%),which will result in a metallic color that is then applied with a sponge on the panels that divide these compartments. For the engine and other components, use a super fine detailing brush. “Five zeros”, the finest at hand. The paint colors selected will give you a chocolate brown wash (Humbrol H-98) that adds depth. Then, weather with Mig AK interactive products, which are: AK 013 (Rust streaks) and AK 083 (Track Wash). These detailing paints will emphasize recent oxides with the oils in the orange range, and then add “Bitumen of
Judea” for heavier grime. The Bitumen is applied as a wash with turpentine thinner.
You can then add some pigments as was done in this case. Especially when you want to represent something that has been in the open as is our purpose with this build.
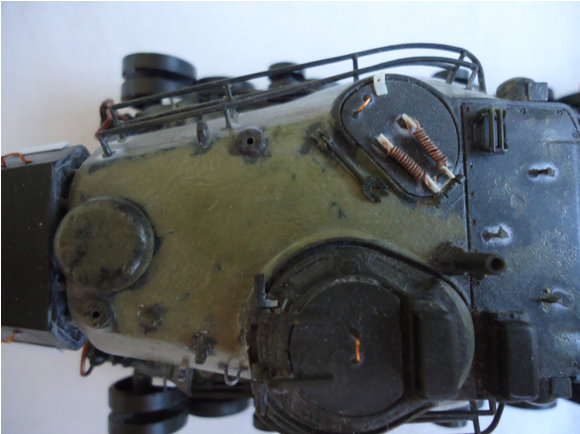
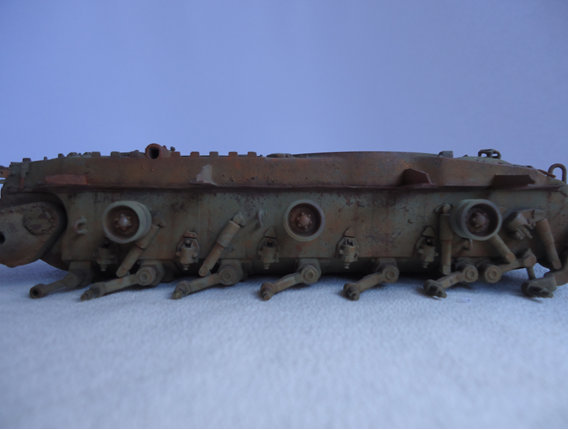
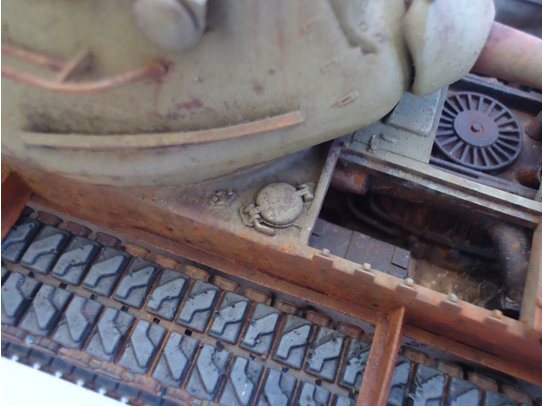
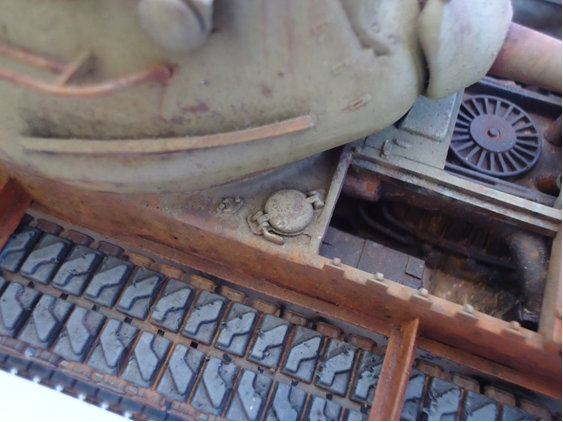
Engine Compartment:
The original white interior has ceased and small amounts of dirt are added into the corners of the engine. The exhaust outlets are left incomplete by implying that some components have been installed. Note the close up pics of the engine compartment. .
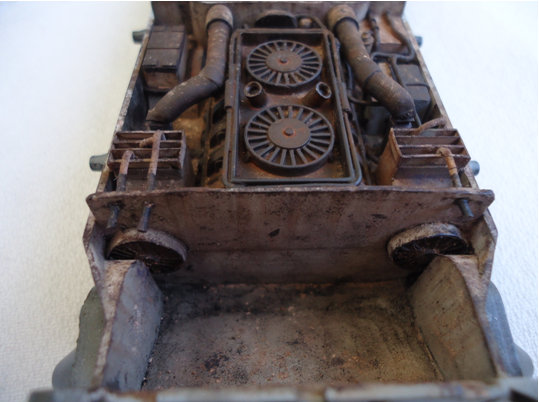
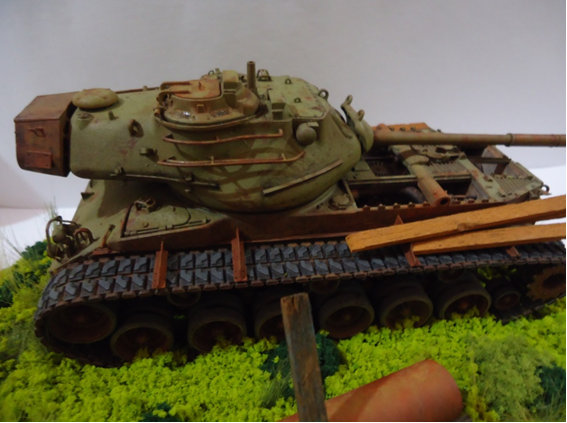
Exterior Detail:
We now begin with the external details in order to add more detail and modifications to make the tank look as if it is neglected.
First, give the M-47exterior a textured look by applying a hand brushed Xylene wash (Xylene is a chemical that melts the plastic that also serves very well as glue). Use an old toothbrush to imitate a rough texture pattern that will show before the Xylene dries.
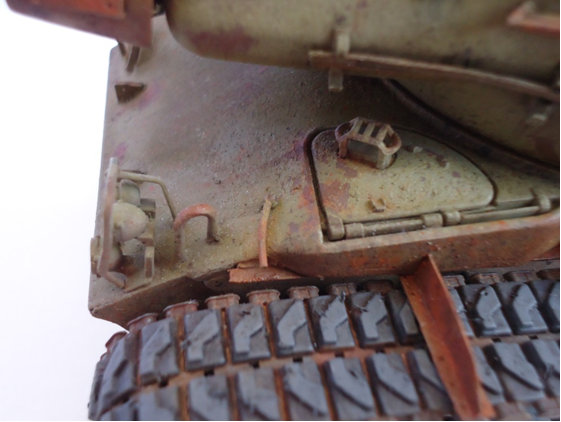
Work on the base of the tow hooks, which are made of plastic left overs. In this case I do these items by hand not because they are bad, but because the reference pics which I am basing my work on showed these hooks as absent. Add extra tow hooks to the rear of the M-47, which are prominently displayed on a second pic that the build is based on.
Take copper wire, and crush it with pliers to build a framework for a headlight protector. Imitate the metal bases of the tow hooks with hobby putty to form a welded structure that the tow hooks are attached to.
When photo etched details are scarce, the solution is to scratch build a replacement. The plastic that has a lighter color has been treated with Xylene.
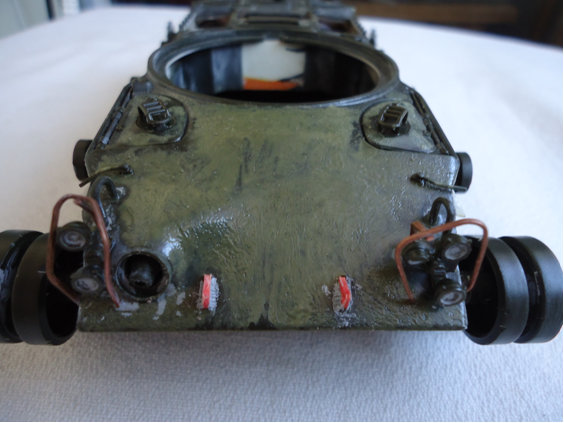
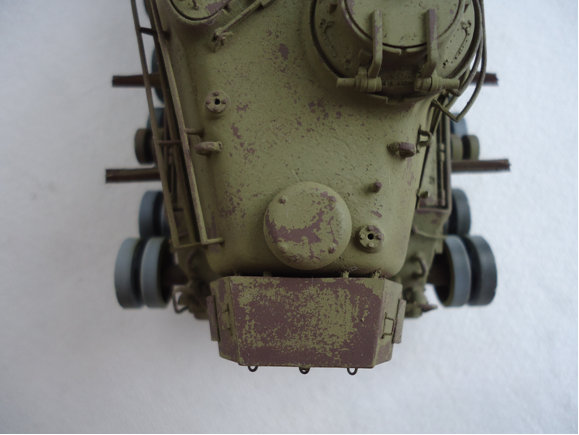
Rear view of the Chassis:
Finish the major assemblies by adding details to the frame supports of the side skirts. This is a simple task, since it consists of gluing two thin plastic strips along the hull.
Turret Detailing:
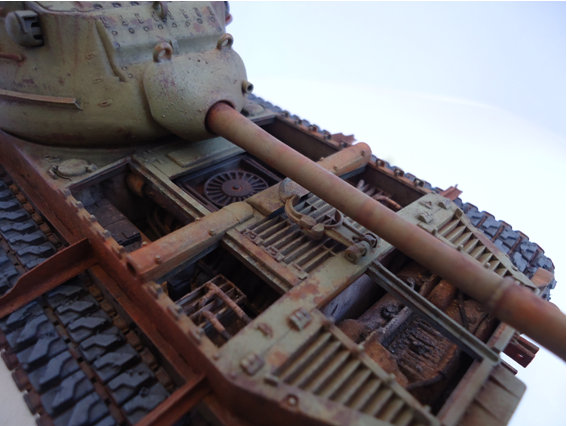
Once the lower hull is finished proceed to the turret. The first order is to give the feeling of a heavily armored vehicle, so repeat the Xylene chemical treatment that has been explained earlier. After this procedure, glue the stock kits parts and then continue to fabricate missing details as well. Some of these details are the hatch springs and hatch handles.
Painting:
I finished the exterior details, then began the paint job with an airbrush. I sprayed (Humbrol H-127), as the base color to check for faults or imperfections.
Once satisfied that the side seam is effectively closed, I proceeded to attach the final detail with the side skirt guides and their supports.
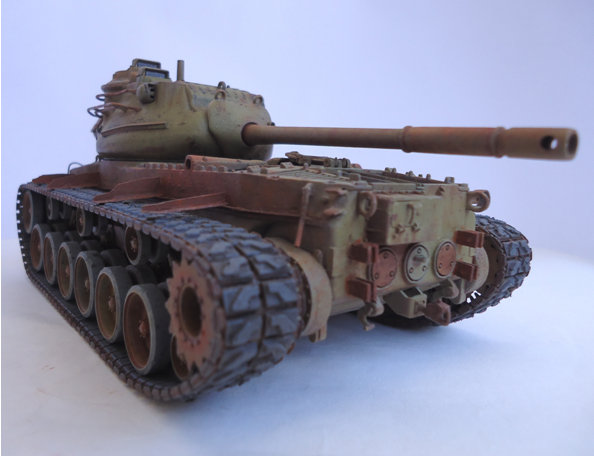
I continued painting with (Humbrol H-113) on the whole model. After painting for five minutes with Olive drab apply ((Humbrol H-155 (65%) mixed with a little yellow Humbrol H-154 (20%), and white Humbrol H-34 (15%)) this recreated a faded green. I waited five minutes and scraped the tank with a stiff bristle brush or an old brush with a little water where we wanted a chipped paint look. Depending on the intensity that we applied this technique it will give a customized amount of weathering to the tank.
The chipped paint look that is achieved will partially depend on the amount of hair spray that is applied. Cautionary note: If you use too much hair spray as was our case, an abandoned vehicle look will be achieved. Proceed carefully because an exaggerated look can be achieved..
Weathering:
Once the model is weathered continue applying a yellow filter, but only in certain areas to provide a color variation. Areas where filters are to be used are the top of the turret, and the top of the chassis, but do not touch the engine area as it has to look darker than the top surface of the tank. Utilize oils in the range of oranges, and apply them on the sides of the tank and at other specified locations where we want this more heavily weathered.
Oils and Scuffs:
After the oil paints, finish with Mig 024 AK (dark streaking grime for dark green vehicles) AK 013 (rust streaks) and AK 083 (track wash). A way to correct vertical strokes is with a brush soaked in turpentine.
The combination of a good paint job in which you have used a good use of color modulation (the more the better) combined with the texturization from the Xylene treatment offers a fairly realistic finish
Finishing:
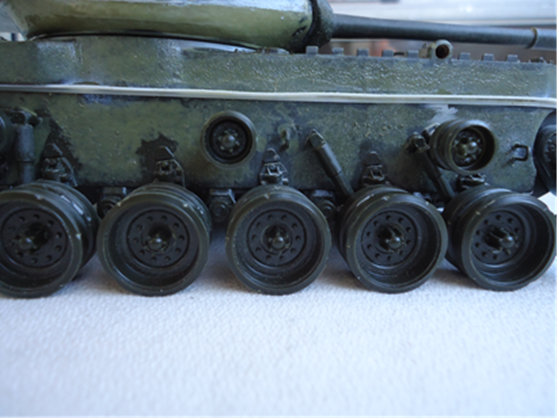
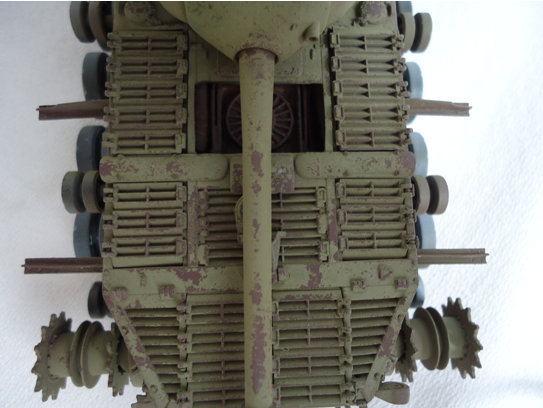
The tracks are painted with a handmade mixture of black (( Humbrol H-33 (75%) over rust inhibiting Humbrol H-113 (25%)), then weathered with Mig AK 083 (track wash) to oxidize and highlight with orange oils.
The last step is to paint the rubber track pads, which were painted with gray to simulate weathering and aging over time. The tracks used were provided by the kit and they are not bad, but if you can get some aftermarket they will be better.
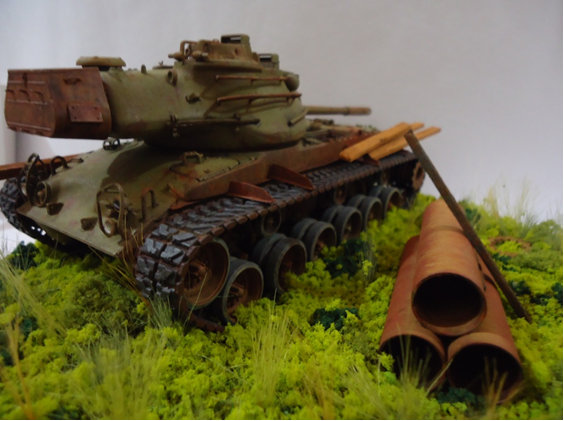
Now, that we have finished the tank it is time to start the display base.
Display Base Assembly and Paint:
To construct a base for the model use floral foam and cover it with epoxy putty. Once we have the putty the way we want it, it is easy to get all kinds of textures into it.
Once dry, the base gets painted a dark brown acrylic earth tone for this type of work any particular brand is O.K. which can then be detailed to suit our needs.
Use white glue to attach vegetation. The idea is to make an open field, so model railroad vegetation comes in handy. The brand to use is “Woodland Scenics” and it has a wide range of products.
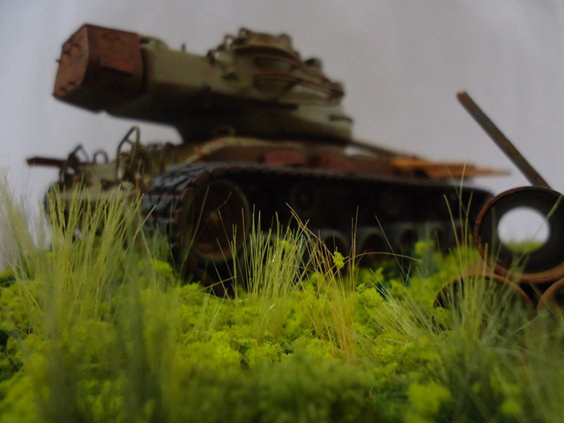
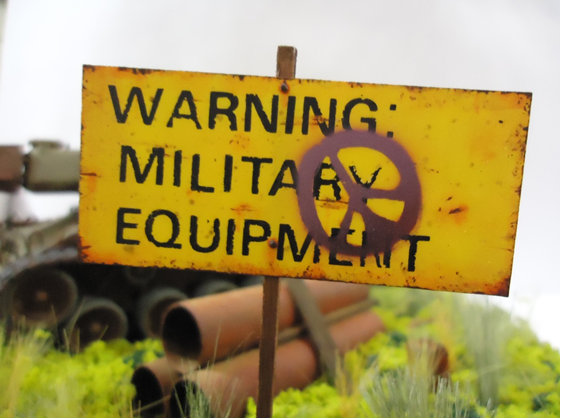
Diorama Accessories:
Diorama accessories for this model are lacking. The sign and pipes are painted with acrylics and oils are used as weathering agents. Use “Bitumen of Judea” to finish the job. The woods are painted with acrylics and worked with Bitumen. In all cases, we apply the well washed bitumen.
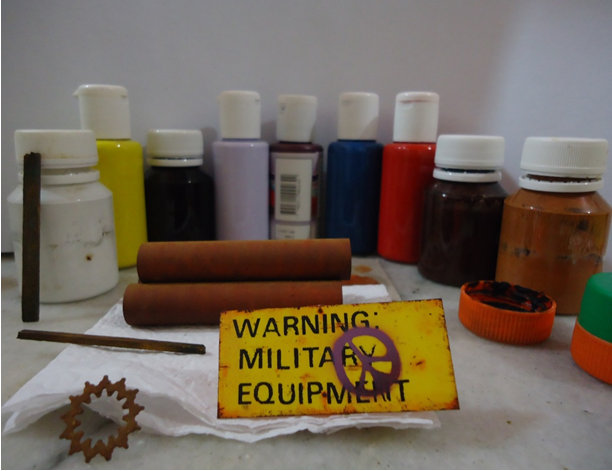
The pipes were covered with light pigments like other accessories except for the sign. The graffiti was painted with acrylics. (The paints used can be seen in the background photo, below.).
Diorama Completion:
The few simple, but successful accessories provide a great attraction and enhance the role of the tank in this scene.
Conclusion:
Modeling the M-47 Patton was a great 1:35 scale armor project. This has been a very interesting build. As I mentioned earlier, the Italeri model kit is not bad and can be super detailed quite nicely. It does, however, fall short of modern day model kits. This is a pity, because so many countries utilized this great Cold War Warrior and there are so few model kits of this tank. I totally recommend the Italeri M-47 Patton to all modelers with some experience and I guarantee you will find a whole world of possibilities. As always, “With basic techniques you can create advanced results!” Cheers and happy modeling,
Text and Picture Credits: Emanuel Paz :aka: Modelismo Austral
Copy Editing: Jeremy Petersen :aka: Dr. Hobby
Copy Formating: Jon Bius :aka: Spitfire Avenger